Style
Style Report: Celebrate the Season in Ruby Rd. Style!
October 11, 2017
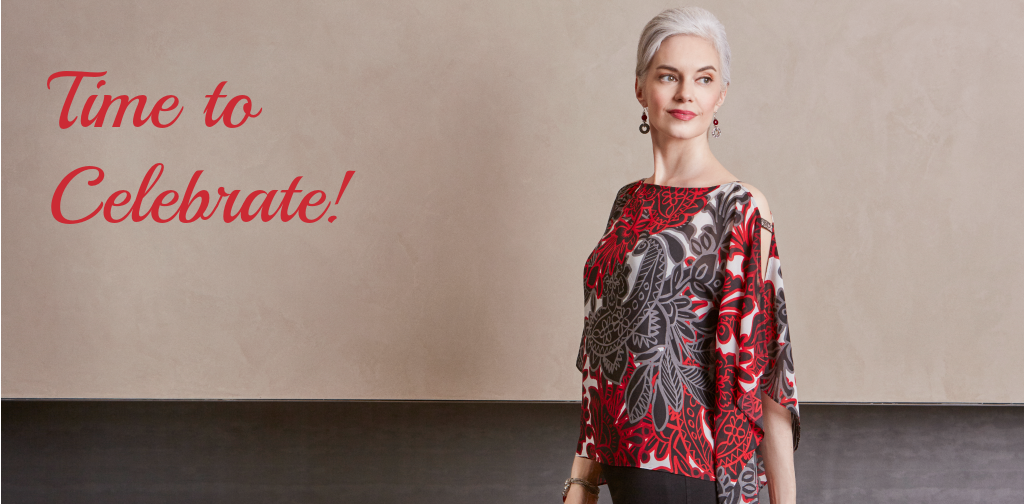
The season of celebrations is about to begin, and we are ready! Add some glam to your gatherings with our top style picks for the months ahead!

Cast a spell in our bewitching looks that take Halloween to a chic new level! Take a walk on the wild side in mixed animal prints that pair perfectly with our pull-on black jeans. Soft metallic hues work like a neutral for easy mix-and-match style.
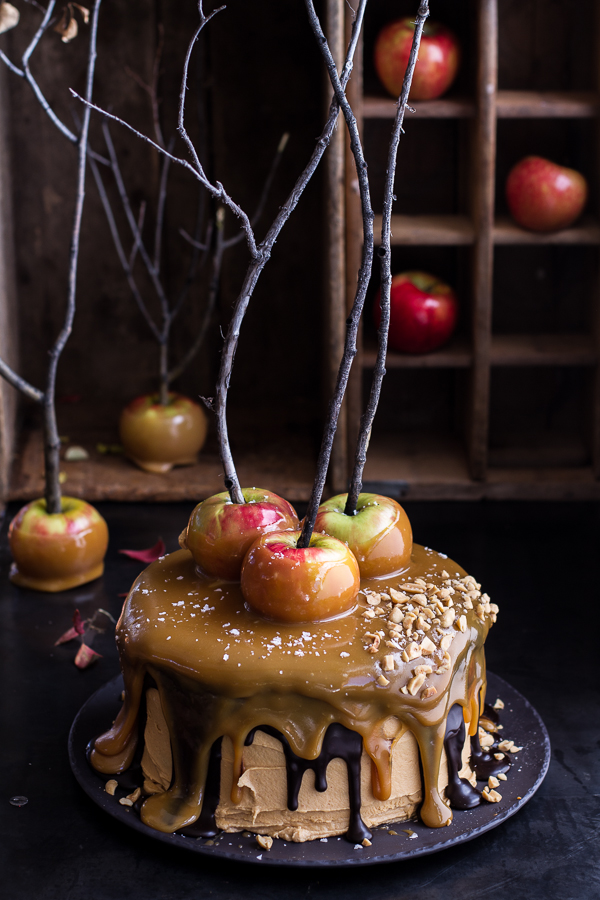
Photo Credit: Half Baked Harvest
Candy isn’t just for the kids! What a ‘grown up’ way to enjoy the Halloween treats we love! Wow your family and friends with this Salted Caramel Apple Snickers Cake from Half Baked Harvest.
Ingredients
-
2 1/4 cup all-purpose flour
-
2 1/4 cups granulated sugar
-
1 1/2 cups unsweetened cocoa powder
-
2 1/4 teaspoons baking soda
-
2 1/4 teaspoons baking powder
-
1 1/2 teaspoon salt
Coupons
-
1 teaspoon cinnamon
-
1/2 teaspoon allspice
-
3 eggs, at room temperature
-
1 1/2 cup, no sugar added, apple sauce
-
3/4 cup canola oil
-
1 1/2 tablespoon vanilla extract
-
1 cup + 2 tablespoons strong brewed coffee, hot (or warm apple cider)
-
Salted Caramel
-
2 cups heavy cream
-
2 cups sugar
-
1 cup honey (or corn syrup)
-
1/2 cup bourbon + 1/2 cup apple cider (or 1 cup cider)
-
1/2 cup butter
-
1 tablespoon vanilla extract
-
1/2 teaspoon kosher salt + flakey salt for sprinkling
-
3 your favorite SMALL apples (I used granny smith and honeycrisp)*
-
6 twigs or wooden sticks
-
Snickers Frosting
-
1 cup unsalted butter, softened
-
4 ounces cream cheese, softened
-
2 cups powdered sugar
-
1/2 cup creamy peanut butter (not the oily kind)
-
1/3 cup salted caramel (ingredients above)
-
2 teaspoons vanilla extract
-
1/2 cup salted peanuts, chopped + more for garnish
-
8 ounces bittersweet chocolate, chopped
-
1/2 cup heavy cream
Instructions
To make the Cake
Preheat the oven to 350 degrees F. Grease three 8-inch (or 9 inch) round cake pans. Line with parchment paper, then butter/spray with cooking spray.
In a medium size bowl combine the flour, sugar, unsweetened cocoa powder, baking soda, baking powder, cinnamon, allspice and salt. Set aside.
In the bowl of a stand mixer (or use a hand held mixer) beat together the eggs, apple sauce, canola oil and vanilla until smooth.
Slowly add the dry ingredients to the wet ingredients with the mixer on low until there are no longer any clumps of flour. Add the hot coffee and mix until combined. Batter should be pourable, but not super thin.
Pour the batter among the 3 cake pans and bake 20 to 25 minutes, until the tops are just set and no longer wiggly in the center. Remove and let cool five minutes, then run a knife around the edges of the pan. Grab 3 large flat plates, line them with wax or parchment paper and invert the cakes onto the paper lined plates. Cover and let the cakes cool completely before frosting.
To Make the Caramel + Frosting
Place sugar, honey, bourbon and apple cider in a large saucepan. Bring to a boil, boil, without stirring, 9 minutes or until light golden in color. Add the heavy cream, butter and vanilla, slowly stirring into pan. Boil for 10-15 minutes or until a candy thermometer reads 210 degrees F., stirring frequently. Remove the sauce from heat and add the salt. Using a heat proof measuring cup scoop out 1 cup of caramel sauce and allow it to cool. Cover the remaining sauce and set aside until the cake is ready (I just covered my pot and set it aside overnight).
Now make the frosting, add the butter, cream cheese and powdered sugar to the bowl of stand mixer (or use a hand held mixer). Beat together until the butter is light and fluffy, about 4 minutes. Add the peanut butter, 1/3 cup of the cooled caramel sauce and the vanilla, beat, scraping down the sides as needed, another 2 minutes or until there are no streaks. Stir in the chopped peanuts.
To Assemble the Cake
Place 1 layer of cake, flat side up, on a plate or cake stand. Drizzle the cake with a little salted caramel sauce (from the reserved 1 cup, not from the pot of caramel). With a knife or offset spatula, spread the top with frosting. Place the second layer on top, rounded side up, and drizzle with caramel. Spread the frosting evenly on the top. Add the final layer of cake and drizzle with the remaining caramel. Frost the top and sides of the cake. Don’t worry about it being too perfect as you will be covering most of it up. Place the cake in fridge.
To make the chocolate coating: In a microwave safe bowl add the chocolate and cream. Microwave on high for 30 second intervals, stirring between each until melted. Allow the sauce to cool 3-5 minutes, and then pour the sauce onto the middle of the cake and spread to just the sides, allow the sauce to drip down the sides of the cake. Place the cake in the fridge preferably overnight, but at least 1 1/2 hours. You need the chocolate to be completely set and the frosting firm.
To Finish.
Once the cake is cool, grab that reserved caramel sauce in the pot. Place it back over medium-high heat and bring it to a boil. Boil for 15-20 minutes or until a candy thermometer reads between 220-230 degrees F (I let mine go to 225 and it was perfect). Remove the sauce from the stove and let is cool 15-20 minutes, stirring every so often. Make sure the caramel does not become too stiff. If it stiffens too much you will not be able to dip the apples. While the sauce cools, push the twigs or wooden sticks into the top of the apples. Line a baking sheet with wax paper.
When the caramel has cooled (it should be a little thicker now, but still pourable), pour about half the caramel over the cake and allow it to fall down the sides of the cake. Working quickly, dip the apples into the remaining caramel and place the in the center of cake. Sprinkle the cake with flakey salt and peanuts. Make room in the fridge for the cake and refrigerate until firm, at least 30 minutes. The caramel should never get completely hard, but should be more of a soft firm. Once the caramel is firm, store the cake in the fridge until ready to serve. Allow the cake to sit 15 minutes at room temp before serving. Please not that this is a delicate and with all the toppings it is a bit tricky to slice. Your slices will not be perfect.

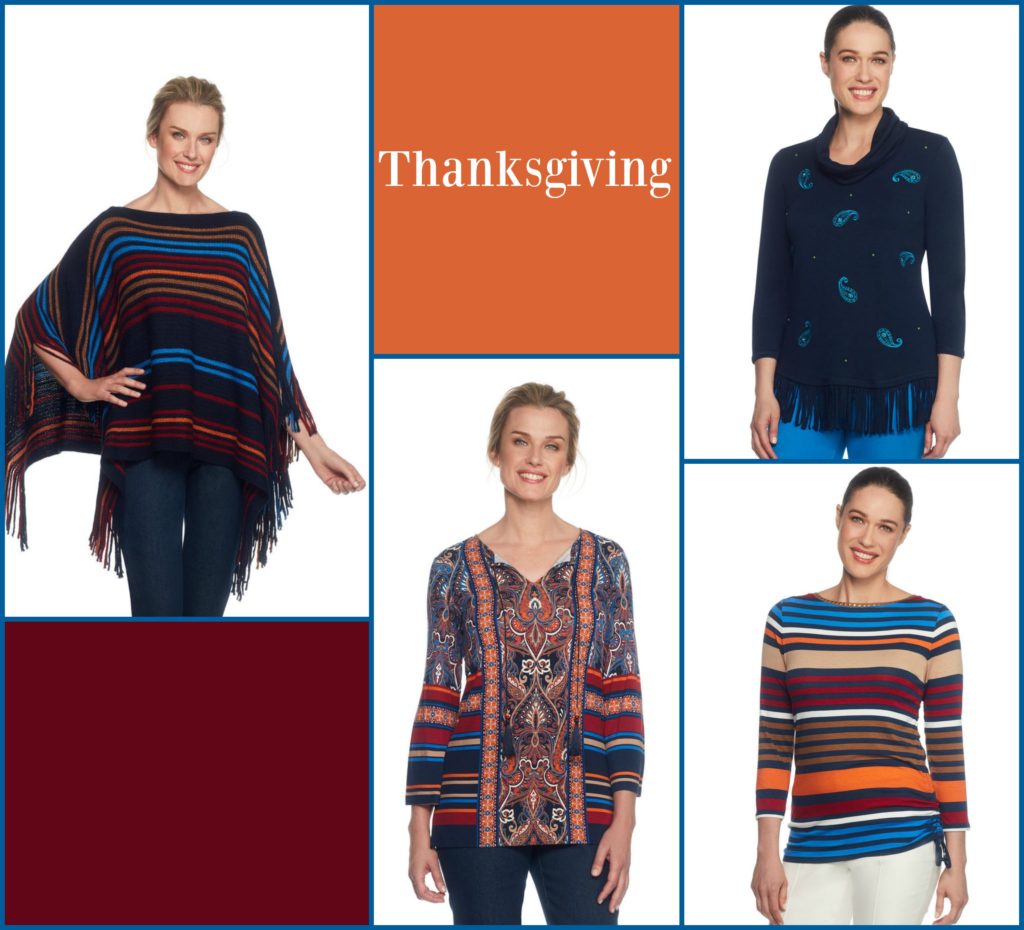
This season is all about luxe layers, and prints and colors with depth! Rich earth tones are ideal for autumn, and make the perfect style statement for your Thanksgiving celebrations. These versatile tops go over jeans or pull-on pants, for instant style makers!
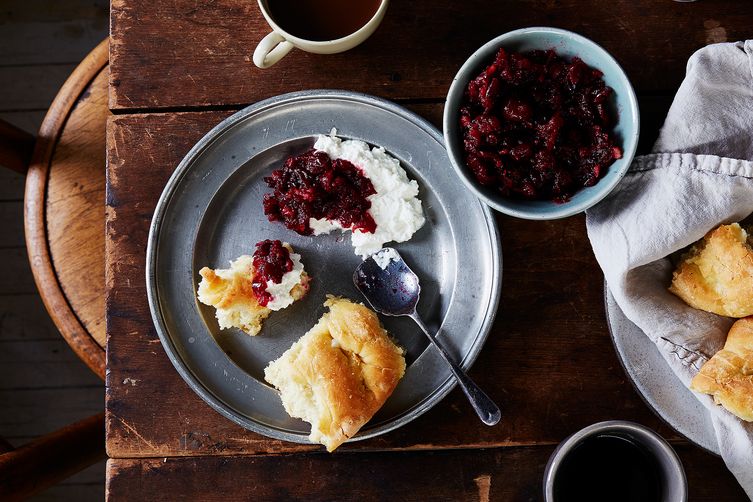
Photo Credit: Food52
Try this sophisticated and savory twist on cranberry sauce at your Thanksgiving table this year! Sweet and rich, this will become a new holiday tradition!
Recipe credit: Food52
Pear, Brandy and Walnut Cranberry Sauce
Serves 6-8 small servings
- 1/3 cup, plus 2-3 tablespoons brandy, divided
- water
- 2 cinnamon sticks, each broken in half
- 8 black peppercorns
- 12 ounces fresh cranberries, picked over
- 3/4 cup packed light brown sugar
- 2 medium bartlett pears, peeled
- 1/2 cup chopped walnuts, toasted and divided
- Pour 1/3 cup brandy into liquid measuring cup; add enough water to reach 1/2 cup liquid total. Set aside. Place broken cinnamon sticks and peppercorns in center of small piece of cheesecloth or large tea bag and tie closed using kitchen twine.
- In medium saucepot, combine cranberries, brown sugar and cinnamon-pepper bundle. Using large holes on a box grater, grate pears into saucepot. Stir in brandy-water mixture.
- Over high heat, bring cranberry mixture to a boil; reduce heat to medium and cook 10-12 minutes, or until cranberries have burst and the mixture has combined, stirring occasionally. Remove from heat.
- Stir in 2 to 3 tablespoons brandy. Let cool. Remove and discard cinnamon bundle. Stir in 7 tablespoons toasted walnuts. Transfer mixture to small serving bowl; sprinkle with remaining walnuts.

Our soft sweaters and tops with accents of supple velvet are the epitome of comfy chic!

Top off your evening! Reach for our tops in striking hues and distinctive textures for those occasions where only something with shimmer and sparkle will do! Trending details like the cold shoulder, and metallic knits in shades of crimson and platinum are eye-catching and perfect for holiday parties!
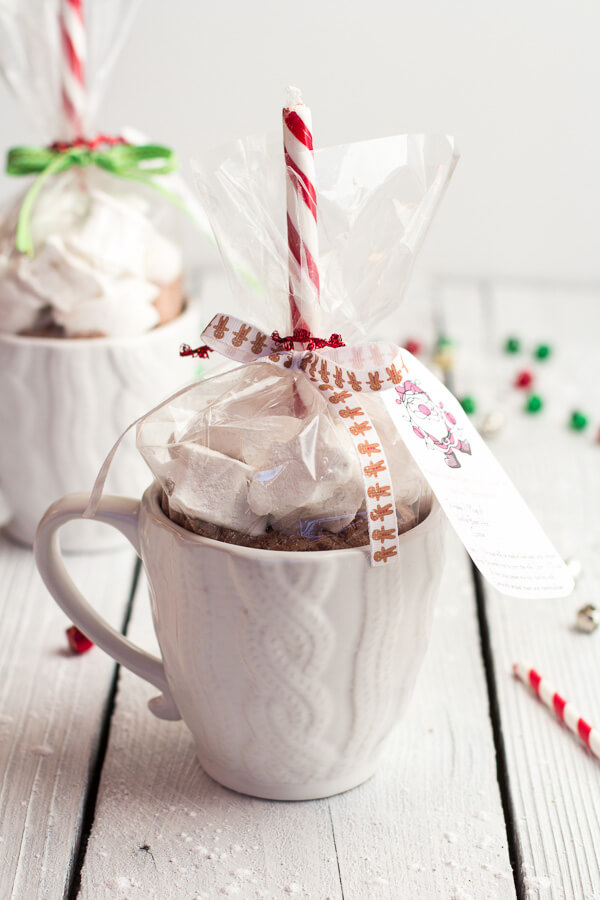
Photo Credit: Half Baked Harvest
These adorable mugs with all the ingredients for a delectable cup of hot chocolate make the perfect gift for guests, neighbors and coworkers.
Easy Double Chocolate Vanilla Bean Hot Cocoa Mugs + Marshmallows
Recipe Credit: Half Baked Harvest
Ingredients
Vanilla Marshmallows
- 3 ounce packages unflavored gelatin 1/4-
- 1/2 cup cold water
- 1/4 cup cold milk
- 2 cups sugar
- 2/3 cup corn syrup karo syrup
- 1/4 teaspoon salt
- 1 teaspoon vanilla extract
- 1 in whole vanilla bean spit half and seeds scraped out (optional)
Double Chocolate Roasted Vanilla Bean Hot Cocoa Mix
- 2 whole vanilla beans
- 3 cups non-fat dry milk
- 3/4 cup powdered sugar
- 1/4 cup granulated sugar
- 1-1/2 cups dutch processed cocoa (or regular cocoa but I really like dutch for this)
- 1 2/3 ounces cups Milk Chocolate Chips 11
- 1/2 cup white chocolate chips 4 ounces
- 1/4 teaspoon kosher salt
- 1 tablespoon instant coffee
To assemble
- 4 ounce or 3 mugs 8-12 mugs, 12-16 ounce
- clear plastic cookie bags I used [these bags | http://www.walmart.com/ip/Pack-of-144-Tall-Cellophane-Christmas-Snowflakes-Cookie-Treat-Bags-with-Bands/26752519] from Walmart
- Holiday ribbon
- Candy canes or red and white striped straws
- [these printable recipe cards| http://projectus.print.avery.com/temp/anonymous/2013-11-29/Projects/da846c9c-9c0f-4814-9a0f-f665ab8a95f7/preview.pdf]
Instructions
- To make the marshmallows. Lightly spray a 9-by-13-inch baking dish with cooking spray. Set aside.
- In the bowl of an electric mixer fitted with the whisk attachment, sprinkle gelatin over 1/2 cup cold water and let stand for 10 minutes. In the meantime place a medium saucepan on the stove. Combine the sugar, corn syrup, and 1/4 cup cold milk. Place saucepan over medium-high heat and bring to a boil. Boil for 1 minute, then remove from heat. Slowly pour the boiling syrup down the side of the mixer bowl into the gelatin mixture. Add salt, vanilla and vanilla bean seeds. Turn the mixer onto medium speed and gradually increase the speed to the highest setting and whip for 12 minutes.
- Spray a rubber spatula. Spread marshmallows evenly into pan using prepared spatula. Spray a sheet of plastic wrap with cooking spray and place, spray side down, on top of marshmallows. Let stand for 2 hours.
- Carefully remove marshmallows from pan. Cut marshmallows into 2-inch squares using a sprayed sharp knife or use mini holiday cookie cutters to cut them into fun holiday shapes. Place powdered sugar in a large bowl. Working in batches, add marshmallows to bowl and toss to coat. Store the marshmallows in an airtight container.
- To make the cocoa mix. Preheat the oven to 350 degrees F. Place the vanilla beans directly on the grates of the oven and roast for 20 minutes. This step is optional, but it really adds amazing vanilla flavor.
- Remove the beans from the oven and place them in the bowl of a food processor. Puree for 2 to 3 minutes, until most of the bean has been broken up. Strain the mixture through a fine mesh strainer and discard any big pieces and place the vanilla powder back in the bowl of the food processor.
- Combine all of the remaining hot cocoa ingredients in a large bowl. Work in two batches, pour half the ingredients from the bowl into the food processor and pulse until the hot chocolate is finely ground. Repeat for second batch.
- To assemble the mugs. Place the bags inside your mugs and spoon the hot cocoa powder into the clear plastic bags. You should have 3 cups total of mix. I mad three mugs with 1 cup of hot cocoa mix in each mug.
- Add the marshmallows right on top of the hot cocoa. I added 1 big handful of marshmallows to each mug. Tie the holiday ribbon around the top to close the bags. Now grab your candy canes or striped straws and stick them right down the center of you mugs (through the center of the marshmallows and cocoa).
- Punch a whole through your recipe cards and slide a piece of ribbon through the hole. Attach the ribbon somewhere on the mug. And start handing out cute little gifts of Christmas warmth and happiness!
We want this to be your best holiday season yet, and we hope you found some inspiration for the celebrations to come!


